Uso de OAKCLI en Oracle Database Appliance (ODA) X5-2 con Alta Disponibilidad.
Introducción
OAKCLI (Oracle Appliance Kit Command Line Interface) es un comando que puede ser usado para monitorear y administrar los componentes del Oracle Database Appliance (ODA). En el Oracle Database Appliance, OAKCLI permite ejecutar tareas como crear, eliminar bases de datos y crear snapshots de la base de datos, entre otras. Esta interface de comandos en linea permite ejecutar las tareas de base de datos de forma más rapida y sencilla.
Configuración del Ambiente :
| ODA Model: | BM Oracle Database Appliance (ODA) X5-2 |
| Public interface: | COPPER |
| ODA Version: | 12.1.2.9.0 |
| Operating system: | Linux version 2.6 (Red Hat 4.4.7-16) |
| Database: | Oracle Database 11g R2 (11.2.0.4.0) Oracle Database 12c R1 (12.1.0.2.0) |
| Hostnames: | DBServer01, DBServer02 |
| Database: | testdev1 |
| Snapshot database: | testdev2 |

1. Como crear una Base de Datos usando OAKCLI en Oracle database appliance (ODA).
1.1 Verificamos con Oakcli la lista de dbhomes disponibles.

1.2 Nos logueamos con una sesion putty al node1 como usuario ‘ROOT’ usando el siguiente comando para crear la base de datos usando oakcli
- oakcli create database -db testdev1 -oh OraDb11204_home1
Este comando crea la base de datos testdev1 con la version Oracle Database 11g R2 (11.2.0.4.0) que esta en el dbhome que se especifica. Para crear la base de datos con la version Oracle Database 12c R1 (12.1.0.2.0), debemos seleccionar el dbhome 12102.
Luego interactivamente elegimos el tipo de carga y el tipo de base de datos. En este ejemplo vamos a seleccionar la opcion 1 para OLTP y luego la opción 1 para Enterprise Edition. Para crear una base de datos en RAC, seleccionar la opción 1 para OLTP y la opción 3 RAC para la base de datos.
[root@DBServer01 : Mon Mar 13, 12:55 PM : /root ]
$ oakcli create database -db testdev1 -oh OraDb11204_home1
INFO: 2017-03-13 12:56:21: Please check the logfile '/opt/oracle/oak/log/DBServer01/tools/
12.1.2.9.0/createdb_testdev1_50904.log' for more details

INFO: 2017-03-13 12:56:23: Database parameter file is not provided. Will be using default
parameters for DB creation

Please enter the 'SYSASM'  password : (During deployment we set the SYSASM password to 'welcome1'):

Please re-enter the 'SYSASM' password:

Please select one of the following for Database type [1 .. 2] :

1    => OLTP
2    => DSS
1

The selected value is : OLTP

Please select one of the following for Database Deployment  [1 .. 3] :

1    => EE : Enterprise Edition
2    => RACONE
3    => RAC
1

The selected value is : EE

Please select one of the following for Node Number  [1 .. 2] :

1    => DBServer01
2    => DBServer02
2

The selected value is : DBServer02

...Please select one of the following for Database Class  [1 .. 5] :

1    => odb-01s  (   1 cores ,     4 GB memory)
2    =>  odb-01  (   1 cores ,     8 GB memory)
3    =>  odb-02  (   2 cores ,    16 GB memory)
4    =>  odb-04  (   4 cores ,    32 GB memory)
5    =>  odb-06  (   6 cores ,    48 GB memory)
1

The selected value is : odb-01s  (   1 cores ,     4 GB memory)

Do you want to setup the EM DB Console for this database [ Y | N ] ? : N

INFO   : Logging all actions in the file /opt/oracle/oak/log/DBServer01/patch/
12.1.2.9.0/DBServer01-20170313125847.log and traces in the file /opt/oracle/oak/
log/DBServer01/patch/12.1.2.9.0/DBServer01-20170313125847.trc

INFO   : Loading the configuration file /opt/oracle/oak/onecmd/create_database.params...

INFO   : Creating the node list files...

INFO   : Setting up ssh for root...

INFO   : Setting up SSH across the Private Network...

...INFO   : Running as root: /usr/bin/ssh -l root 192.168.0.11 /root/DoAllcmds.sh

INFO   : Background process 59846 (node: 192.168.0.11) gets done with the exit code 0

INFO   : Running as root: /usr/bin/ssh -l root 192.168.0.12 /root/DoAllcmds.sh

INFO   : Background process 59872 (node: 192.168.0.12) gets done with the exit code 0

INFO   : Setting up SSH completed successfully

INFO   : Running the command /usr/bin/rsync -tarqvz /opt/oracle/oak/onecmd/
root@192.168.0.12:/opt/oracle/oak/onecmd --exclude=*zip --exclude=*gz --exclude=*log
--exclude=*trc --exclude=*rpm to sync directory on node < 192.168.0.12>

SUCCESS: Ran /usr/bin/rsync -tarqvz /opt/oracle/oak/onecmd/ root@192.168.0.12:/opt/oracle/
oak/onecmd --exclude=*zip --exclude=*gz --exclude=*log --exclude=*trc --exclude=*rpm and
it returned: RC=0

...INFO   : Did not do scp for node : DBServer01

INFO   : Running as root: /usr/bin/ssh -l root DBServer01 /root/DoAllcmds.sh

INFO   : Running as root: /usr/bin/ssh -l root DBServer02 /root/DoAllcmds.sh

INFO   : Background process 60930 (node: DBServer01) gets done with the exit code 0

INFO   : Background process 60953 (node: DBServer02) gets done with the exit code 0

INFO   : Did not do scp for node : DBServer01

INFO   : Running as root: /usr/bin/ssh -l root DBServer02 /opt/oracle/oak/onecmd/tmp/
DoAllcmds-20170313125929.sh

INFO   : Running as root: /usr/bin/ssh -l root DBServer01 /opt/oracle/oak/onecmd/tmp/
DoAllcmds-20170313125929.sh

INFO   : Background process 61015 (node: DBServer01) gets done with the exit code 0

INFO   : Background process 61038 (node: DBServer02) gets done with the exit code 0

INFO   : Setting up SSH for user oracle...

...INFO   : checking nodes in /opt/oracle/oak/onecmd/tmp/db_nodes...

...

SUCCESS: All nodes in /opt/oracle/oak/onecmd/tmp/db_nodes are pingable and alive.

INFO   : Checking SSH setup for user (oracle) on nodes in /opt/oracle/oak/onecmd/tmp/
db_nodes...

INFO   : Did not do scp for node : DBServer01

INFO   : This is root, will become oracle and run: /bin/su oracle -c /usr/bin/ssh -l
oracle DBServer01 /opt/oracle/oak/onecmd/tmp/DoAllcmds-20170313125956.sh

INFO   : Running on the local node: /bin/su oracle -c /opt/oracle/oak/onecmd/tmp/
DoAllcmds-20170313125956.sh

INFO   : Background process 62901 (node: DBServer01) gets done with the exit code 0

INFO   : This is root, will become oracle and run: /bin/su oracle -c /usr/bin/ssh -l
oracle DBServer02 /opt/oracle/oak/onecmd/tmp/DoAllcmds-20170313125956.sh

INFO   : Background process 62945 (node: DBServer02) gets done with the exit code 0

INFO   : Setting up ACFS storage

INFO   : Did not do scp for node : DBServer01

INFO   : Running as root: /usr/bin/ssh -l root DBServer01 /opt/oracle/oak/onecmd/tmp/
acfsm_50904.sh

INFO   : Running as root: /usr/bin/ssh -l root DBServer02 /opt/oracle/oak/onecmd/tmp/
acfsm_50904.sh

INFO   : Background process 63082 (node: DBServer01) gets done with the exit code 0

INFO   : Background process 63109 (node: DBServer02) gets done with the exit code 0

INFO: 2017-03-13 13:00:20: Successfully setup the storage structure for the database
'testdev1'

SUCCESS: Successfully setup ACFS storage for the database testdev1

INFO   : Creating Database using DBCA...

INFO   : Did not do scp for node : DBServer01

INFO   : Running as root: /usr/bin/ssh -l root DBServer01 /opt/oracle/oak/onecmd/tmp/
DoAllcmds-20170313130020.sh

INFO   : Background process 65647 (node: DBServer01) gets done with the exit code 0

INFO   : Running as root: /usr/bin/ssh -l root DBServer02 /opt/oracle/oak/onecmd/tmp/
DoAllcmds-20170313130020.sh

INFO   : Background process 65672 (node: DBServer02) gets done with the exit code 0

INFO   : Running DBCA using /opt/oracle/oak/onecmd/tmp/dbca-testdev1.sh on DBServer02
 as oracle...

INFO   : Check output in /opt/oracle/oak/onecmd/tmp/dbca-testdev1-20170313125847.log
on DBServer02

...

INFO   : This is root, will become oracle and run: /bin/su oracle -c /usr/bin/ssh -l
oracle DBServer02 /opt/oracle/oak/onecmd/tmp/dbca-testdev1.sh

         Instance testdev1 is running on node DBServer02
INFO   : One or more Instances running on the cluster nodes.

INFO   : Running export ORACLE_HOME=/u01/app/oracle/product/11.2.0.4/dbhome_1;/u01/
app/oracle/product/11.2.0.4/dbhome_1/bin/srvctl setenv database -d testdev1 -t
'TZ=America/New_York' to set DB timezone

INFO   : Running the command /u01/app/12.1.0.2/grid/bin/crsctl stat resource ora.
testdev1.db -p

...

INFO   : This is root, will become oracle and run: /bin/su oracle -c /usr/bin/ssh
-l oracle DBServer02 /opt/oracle/oak/onecmd/tmp/dbupdates-testdev1.sh

INFO   : Running export ORACLE_HOME=/u01/app/oracle/product/11.2.0.4/dbhome_1;/u01/
app/oracle/product/11.2.0.4/dbhome_1/bin/srvctl stop database -d testdev1

INFO   : Running export ORACLE_HOME=/u01/app/oracle/product/11.2.0.4/dbhome_1;/u01/
app/oracle/product/11.2.0.4/dbhome_1/bin/srvctl start database -d testdev1

INFO: 2017-03-13 13:08:12: Successfully set the RMAN SNAPSHOT control file

SUCCESS: 2017-03-13 13:08:18: Successfully created the Database : testdev1

[ root@DBServer01 : Mon Mar 13, 01:08 PM : /root ]
1.3 Al finalizar la creación verificamos si el servicio de la base de datos esta online, para ello vamos a usar el comando crsstat.
[oracle@DBServer02 ~]$ crsstat
ora.testdev1.db                         ONLINE     ONLINE on DBServer02
1.4 Usando el comando oakcli podemos verificar si la base de datos fue creada en el home correcto y la versión correcta
- oakcli show databases
testdev1 SINGLE  ACFS   OraDb11204_home1  /u01/app/oracle/product/11.2.0.4/dbhome_1
  11.2.0.4.161018(24006111,23054319)
2. Como realizar un Upgrade de la Base de Datos de Oracle Database 11g R2 (11.2.0.4.0) a Oracle Database 12c R1 (12.1.0.2.0) usando el comando OAKCLI en Oracle Database Appliance (ODA).
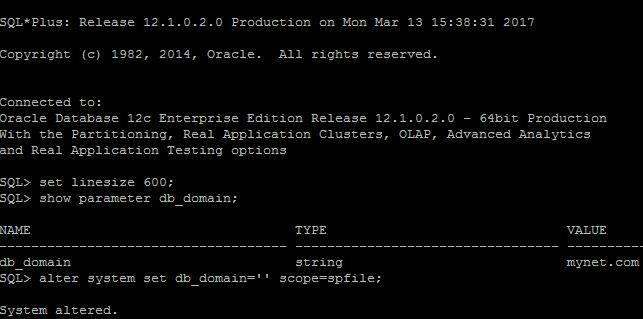
2.1. Para realizar el Upgrade de Base de Datos de Oracle Database 11g R2 (11.2.0.4.0) a Oracle Database 12c R1 (12.1.0.2.0) primero tenemos que setear el db_domain en nulo y luego reiniciar la base de datos usando el comando srvctl.
Seteamos db_domain:
Reiniciamos la base de datos: testdev1
[oracle@DBServer02 infracdb]$ srvctl stop database -d testdev1
[oracle@DBServer02 infracdb]$ srvctl start database -d testdev1
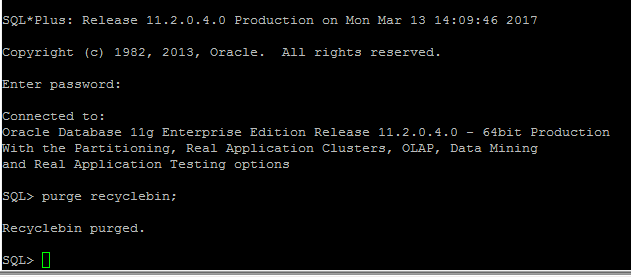
2.2 Depuramos el recyclebin en la base de datos que estamos actualizando. Nos logueamos a la base de datos testdev1 y ejecutamos:
- Purge recyclebin;
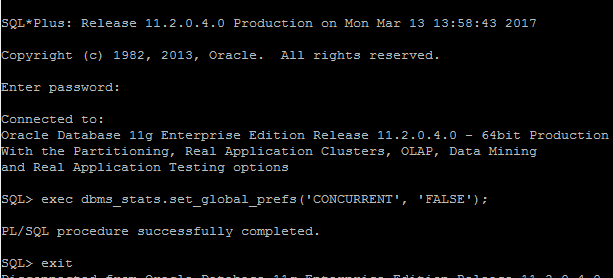
2.3 Ejecutamos el paquete dbms_stats.set_global_prefs para solucionar el bug(Bug 19664340 - ORA-20000).
“Unable to gather statistics concurrently" durante el upgrade a 12.1 ( Doc ID 19664340.8 ).
- liexec dbms_stats.set_global_prefs('CONCURRENT', 'FALSE');
2.4 Nos logueamos con una sesion putty al node1 como usuario root. Realizamos el Upgrade usando el comando oakcli. Nos va a pedir la clave del usuario SYS.
- oakcli upgrade database -db testdev1 -from OraDb11204_home1 -to OraDb12102_home1
En nuestro ejemplo:
[ root@DBServer01 : Mon Mar 13, 02:36 PM : /root ]

$ oakcli upgrade database -db testdev1 -from OraDb11204_home1 -to OraDb12102_home1

INFO: 2017-03-13 14:36:40: Look at the log file '/opt/oracle/oak/log/DBServer01/
tools/12.1.2.9.0/dbupgrade_59524.log' for more details

Please enter the 'SYS'  password :

Please re-enter the 'SYS' password:

INFO: 2017-03-13 14:37:16: Upgrading the database testdev1. It will take few minutes.
 Please wait...

...

...

SUCCESS: 2017-03-13 14:54:05: Successfully upgraded the database testdev1

[ root@DBServer01 : Mon Mar 13, 02:54 PM : /root ]
2.5 Verificamos la version de la base de datos luego de finalizar el punto anterior (upgrade con oakcli). Utilizamos el comando : oakcli show databases que lista las bases de datos que hay en el servidor con sus dbhomes y versiones.
- $ oakcli show databases
testdev1 SINGLE     ACFS      OraDb12102_home1
/u01/app/oracle/product/12.1.0.2/dbhome_1
12.1.0.2.161018(24006101,23854735)
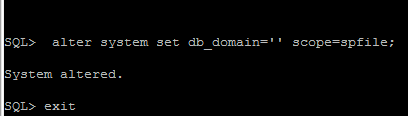
2.6 Una vez que finalizamos la actualización en forma exitosa, podemos si lo necesitamos, volver a cambiar el valor del parámetro db_domain y luego reiniciamos la base de datos usando srvctl.

Reiniciamos la base de datos testdev1.
[oracle@DBServer02 infracdb]$ srvctl stop database -d testdev1
[oracle@DBServer02 infracdb]$ srvctl start database -d testdev1
3. Como crear un Snapshot Database usando OAKCLI en Oracle Database Appliance (ODA).
Usando oakcli podemos crear un snapshot de una base de datos existente. En esta sesion creamos testdev2 usando testdev1.
3.1 Usando la base de origen testdev1 setear el parámetro db_domain en null. Reiniciar la base de datos usando srvctl.
Reiniciamos la base de datos: testdev1
[oracle@DBServer02 infracdb]$ srvctl stop database -d testdev1
[oracle@DBServer02 infracdb]$ srvctl start database -d testdev1
3.2 Usamos el siguiente comando para crear una snapshot database testdev2 desde testdev1.
$ oakcli create snapshotdb -db testdev2 -from testdev1

INFO: 2017-03-14 12:02:54: Please check the logfile  '/opt/oracle/oak/log/
DBServer01/tools/12.1.2.9.0/createdb_testdev2_86330.log' for
more details

Please enter the 'SYS'  password for the Database testdev1:

Please re-enter the 'SYS' password:

Please select one of the following for EE Database Node  [1 .. 2] :

1    => DBServer01
2    => DBServer02
2

The selected value is : DBServer02

Please select one of the following for Database Class  [1 .. 5] :

1    => odb-01s  (   1 cores ,     4 GB memory)
2    =>  odb-01  (   1 cores ,     8 GB memory)
3    =>  odb-02  (   2 cores ,    16 GB memory)
4    =>  odb-04  (   4 cores ,    32 GB memory)
5    =>  odb-06  (   6 cores ,    48 GB memory)
1

The selected value is : odb-01s  (   1 cores ,     4 GB memory)

......

SUCCESS: All nodes in /opt/oracle/oak/temp_clunodes.txt are pingable and alive.

......

SUCCESS: All nodes in /opt/oracle/oak/temp_clunodes.txt are pingable and alive.

INFO: 2017-03-14 12:14:31: Creating the SNAP Database 'testdev2' from the source
 Database 'testdev1'

INFO: 2017-03-14 12:14:50: Taking SNAP of the Database 'testdev1'

INFO: 2017-03-14 12:14:52: Successfully took  the SNAP of database: testdev1

INFO: 2017-03-14 12:16:10: Creating controlfile for database: testdev2

INFO: 2017-03-14 12:16:27: Successfully created the control file for the
database : testdev2

INFO: 2017-03-14 12:16:31: Recovering the database: testdev2,  until time :
'2017-03-14:12:15:18'

INFO: 2017-03-14 12:16:33: Successfully recovered the database

INFO: 2017-03-14 12:16:33: Opening the database with resetlogs

INFO: 2017-03-14 12:16:41: Successfully opened the database after recovery

INFO: 2017-03-14 12:16:44: Setting the temporary tablespace for database :
testdev2

INFO: 2017-03-14 12:16:47: Successfully set the temporary tablespace for the
database : testdev2

INFO: 2017-03-14 12:17:17: Successfully changed the Database ID

INFO: 2017-03-14 12:17:53: Adding the Database resource to the clusterware

INFO: 2017-03-14 12:19:54: Successfully started the database

INFO: 2017-03-14 12:19:54: Updating the TNS entries for the database testdev2

INFO: 2017-03-14 12:20:13: Successfully set the RMAN SNAPSHOT control file

INFO: 2017-03-14 12:20:26: Disabling the external references in the database
'testdev2' inherited from 'testdev1'

INFO: 2017-03-14 12:20:27: Successfully disabled the external references

INFO: 2017-03-14 12:20:53: Run the SQL script '/u01/app/oracle/product/
11.2.0.4/dbhome_1/enable_external_refs_testdev2_zkfw.sql' on the database
'testdev2' to enable these external references

 Also need to restart the database after running the SQL script

SUCCESS: 2017-03-14 12:21:30: Successfully created the Database 'testdev2'
from 'testdev1'
4. Como borrar una base de datos usando OAKCLI en el Oracle Database Appliance (ODA).
4.1 Nos conectamos con sys a la base de datos desde una sesion putty. Ejecutamos una reinicializacion “Reset” del parámetro db_domain usando el comando alter system y luego reiniciamos la base de datos usando srvctl.
Para reinicializar db_domain ejecutamos el siguiente comando:
- alter system reset db_domain scope=spfile;

Ejecutamos el commando srvctl para reiniciar la base testdev1.
[oracle@DBServer02 infracdb]$ srvctl stop database -d testdev1
[oracle@DBServer02 infracdb]$ srvctl start database -d testdev1
4.2 Borramos la base de datos testdev1 usando oakcli.
Desde una sesion de putty logueados al node1 como usuario “root2 ejecutamos el siguiente commando para eliminar la base de datos testdev1.
- oakcli delete database -db testdev1
[ root@DBServer01 : Tue Mar 14, 12:21 PM : /root ]
$ oakcli delete database -db testdev1
INFO: 2017-03-14 12:27:02: Look at the log file '/opt/oracle/oak/log/DBServer01/
tools/12.1.2.9.0/deletedatabase_testdev1_71430.log' for more details
Please enter the 'SYS'  password :
Please re-enter the 'SYS' password:
All the storage volumes created for the database 'testdev1' will be deleted. Do
you want to continue [Y|N]:Y
INFO: 2017-03-14 12:27:43: Deleting the database testdev1. It will take few minutes.
 Please wait...
INFO: 2017-03-14 12:27:46: Setting up SSH
...SUCCESS: Ran /usr/bin/rsync -tarqvz /opt/oracle/oak/onecmd/ root@192.168.0.12:/o
pt/oracle/oak/onecmd --exclude=*zip --exclude=*gz --exclude=*log --exclude=*trc
--exclude=*rpm and it returned: RC=0
.........
SUCCESS: All nodes in /opt/oracle/oak/onecmd/tmp/db_nodes are pingable and alive.
INFO: 2017-03-14 12:28:46: SSH has been successfully established
INFO: 2017-03-14 12:29:36: Successfully deleted the database 'testdev1'
Resumen del comando OAKCLI y sus opciones:
- Ayuda (Help)
Oakcli –h
- Listar la version de software del ODA
oakcli show version
oakcli show version –detail
- Listar los homes del software Oracle Database (RDBMS)
oakcli show dbhomes
- Listar las bases de datos
oakcli show databases
- Listar el Storage
oakcli show dbstorage
- Crear una Base de Datos
oakcli create database -db db_name -oh dbhome
- Borrar una Base de Datos
oakcli delete database -db testdev1
- Validar componentes del ODA
Oakcli validate –a
- Redimenscionar un DiskGroup de la Base de Datos
oakcli resize dbstorage -data size -reco size -redo size -db db_name
- Listar el Invetario de Oracle
oakcli inventory –q
Para verificar si el demonio de oakcli esta corriendo
ps -ef|grep oakd
Conclusión:
Usando el comando OAKCLI para ejecutar tareas de administracion de la base de datos, la administración resulta mucho más sencilla. Es la forma recomendada por Oracle para crear y eliminar bases de datos en el Oracle Database Appliance.


Comentarios
Publicar un comentario